

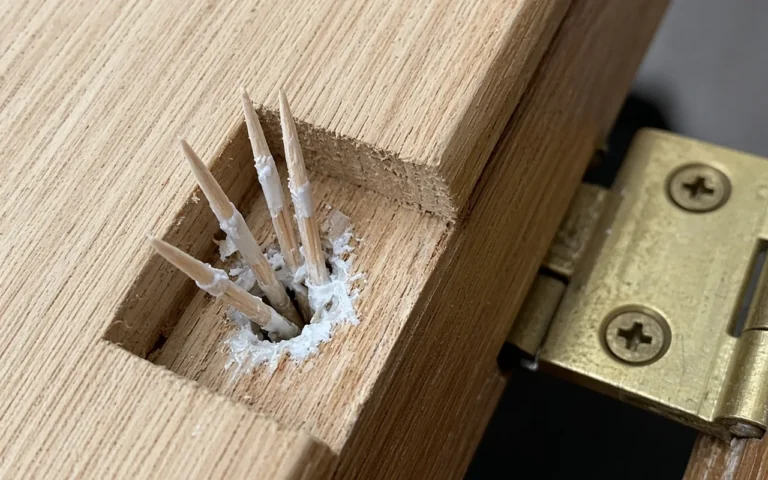
Stripped screws in wood can be fixed effectively using various methods to restore strong threads. Solutions like using wood filler, oversized screws, or thread inserts can provide reliable repairs, ensuring the integrity of your project.
Essential Tools and Materials for Repairs
To effectively repair stripped screws in wood, having the right tools and materials is crucial for a successful outcome. This section outlines the essential items you’ll need to ensure a strong and durable fix, allowing you to tackle the problem with confidence and precision. Equip yourself with these essentials to streamline the repair process and restore your woodwork.
Before starting the repair process, gather the necessary tools and materials. Having everything on hand will streamline your work and minimize interruptions. Here’s what you need:
| Tool or Material | Purpose |
|---|---|
| Wood filler | Fills stripped holes |
| Oversized screws | Replaces stripped screws |
| Thread inserts | Provides new threads |
| Drill | Prepares holes for inserts |
| Screwdriver | Drives screws into wood |
| Clamp | Secures pieces during repair |
Repair Workspace Setup and Safety Tips
Creating a safe and organized workspace is essential when tackling the challenge of fixing stripped screws in wood. Proper setup not only enhances efficiency but also minimizes the risk of accidents. By following these safety tips and guidelines, you can ensure a smooth repair process while protecting yourself and your materials.
Proper preparation is essential for a successful repair. Ensure your workspace is clean and well-lit.
Wear safety goggles to protect your eyes from debris. If you’re using power tools, follow the manufacturer’s safety guidelines.
Check the wood for any underlying damage. If the wood is rotting or severely damaged, consider replacing the section instead of repairing it. This ensures a longer-lasting solution.
Step-by-Step Guide to Fix Stripped Screws
Dealing with stripped screws in wood can be frustrating, but there are effective methods to restore their grip and functionality. This step-by-step guide will walk you through various techniques to fix stripped screws, ensuring a secure hold and prolonging the life of your projects. Follow these instructions to tackle the issue confidently and efficiently.
Follow these steps to effectively fix stripped screws in wood. Choose the method that best suits your situation.
Assess the Damage
Determine the extent of the stripping. If the screw is loose but still partially engaged, you may be able to tighten it. If it spins freely, proceed with one of the following methods.Use Wood Filler
Clean the hole of any debris.
Fill the hole with wood filler using a putty knife.
Allow the filler to dry completely.
Drill a new pilot hole into the dried filler.
Insert a new screw into the pilot hole.
Install Oversized Screws
Remove the stripped screw completely.
Select a larger screw that fits the existing hole.
Drill a pilot hole if necessary.
Drive the oversized screw into the hole securely.
Use Thread Inserts
Drill out the stripped hole to the recommended size for the insert.
Insert the thread insert into the hole.
Screw in a new screw into the thread insert for a secure fit.
Common Mistakes to Avoid
When tackling the challenge of fixing stripped screws in wood, it’s crucial to recognize common pitfalls that can undermine your efforts. Many DIY enthusiasts inadvertently make mistakes that can worsen the problem or lead to further damage. Understanding these missteps will help you achieve a more effective and lasting solution.
When repairing stripped screws, certain errors can lead to further issues. Avoid these common pitfalls:
Not cleaning the hole before applying filler can lead to poor adhesion.
Using screws that are too small will not provide a secure hold.
Failing to let filler dry completely can weaken the repair.
Over-tightening screws can strip the repair again.
Creative Fixes for Stripped Wood Screws
Stripped wood screws can be a frustrating setback in any project, but there are several creative solutions to restore their grip and functionality. This section explores innovative methods and materials that can help you secure a stripped screw effectively, ensuring a strong hold and prolonging the life of your woodwork. Discover practical techniques that can turn a potential disaster into a simple fix.
In some cases, traditional methods may not suffice. Here are alternative solutions for specific scenarios:
Epoxy Solutions for Load-Bearing Applications
When dealing with stripped screws in wood, especially in load-bearing applications, epoxy can provide a robust solution. This section explores various epoxy methods that not only restore the integrity of the screw hole but also enhance the strength and durability of the repair, ensuring a long-lasting fix for your woodworking projects.
For applications that bear significant weight, consider using epoxy. It creates a strong bond and can fill gaps effectively.
Mix the epoxy according to the instructions.
Fill the hole with the mixture.
Insert a screw while the epoxy is still wet for a strong hold.
Wooden Dowels for Reinforcing Stripped Holes
When dealing with stripped screw holes in wood, wooden dowels offer a reliable solution for reinforcement. By using dowels, you can restore the integrity of the damaged area, allowing for a secure fit for screws and preventing future issues. This method not only strengthens the joint but also ensures a long-lasting repair.
For larger stripped holes, using wooden dowels can provide a more robust solution.
Drill a hole to the size of the dowel.
Insert the dowel with wood glue.
Allow the glue to dry before drilling a new pilot hole for the screw.
Precision Techniques for Wood Screw Repairs
When dealing with stripped screws in wood, employing precise techniques can significantly enhance repair effectiveness. Understanding the right methods not only restores functionality but also ensures the integrity of the wood remains intact. This section delves into specific strategies that can help you achieve a stronger, more reliable hold for your screws.
Always ensure that your repairs are clean and precise. Double-check the size of screws and inserts before proceeding. A well-executed repair will enhance the longevity of your wood project and maintain its structural integrity.
For more repairs like this, start in the Start Here hub. If you are working through a related problem next, see Water Damaged Wood Floor Repair (Easy DIY Restoration Steps) or Warped Wood Floor Repair (Fix It Yourself Without a Pro).
